First steps
This page walks through the first ten minutes: one key for your client work on GitHub, one for a
server, and – if you already have a ~/.ssh/config – taking over what is there. The labels below are
those of the English interface; with a German system the app is in German (switch it under
Settings → Language).
Already have keys and a ~/.ssh/config?
Start with Taking over an existing setup below. Keybund turns
your existing Host blocks into keys in one click and leaves the key files where they are.
1. Create a key
Click New key, give it a name you recognise – “Client C”, “Private”, “NAS” – and click Create key.
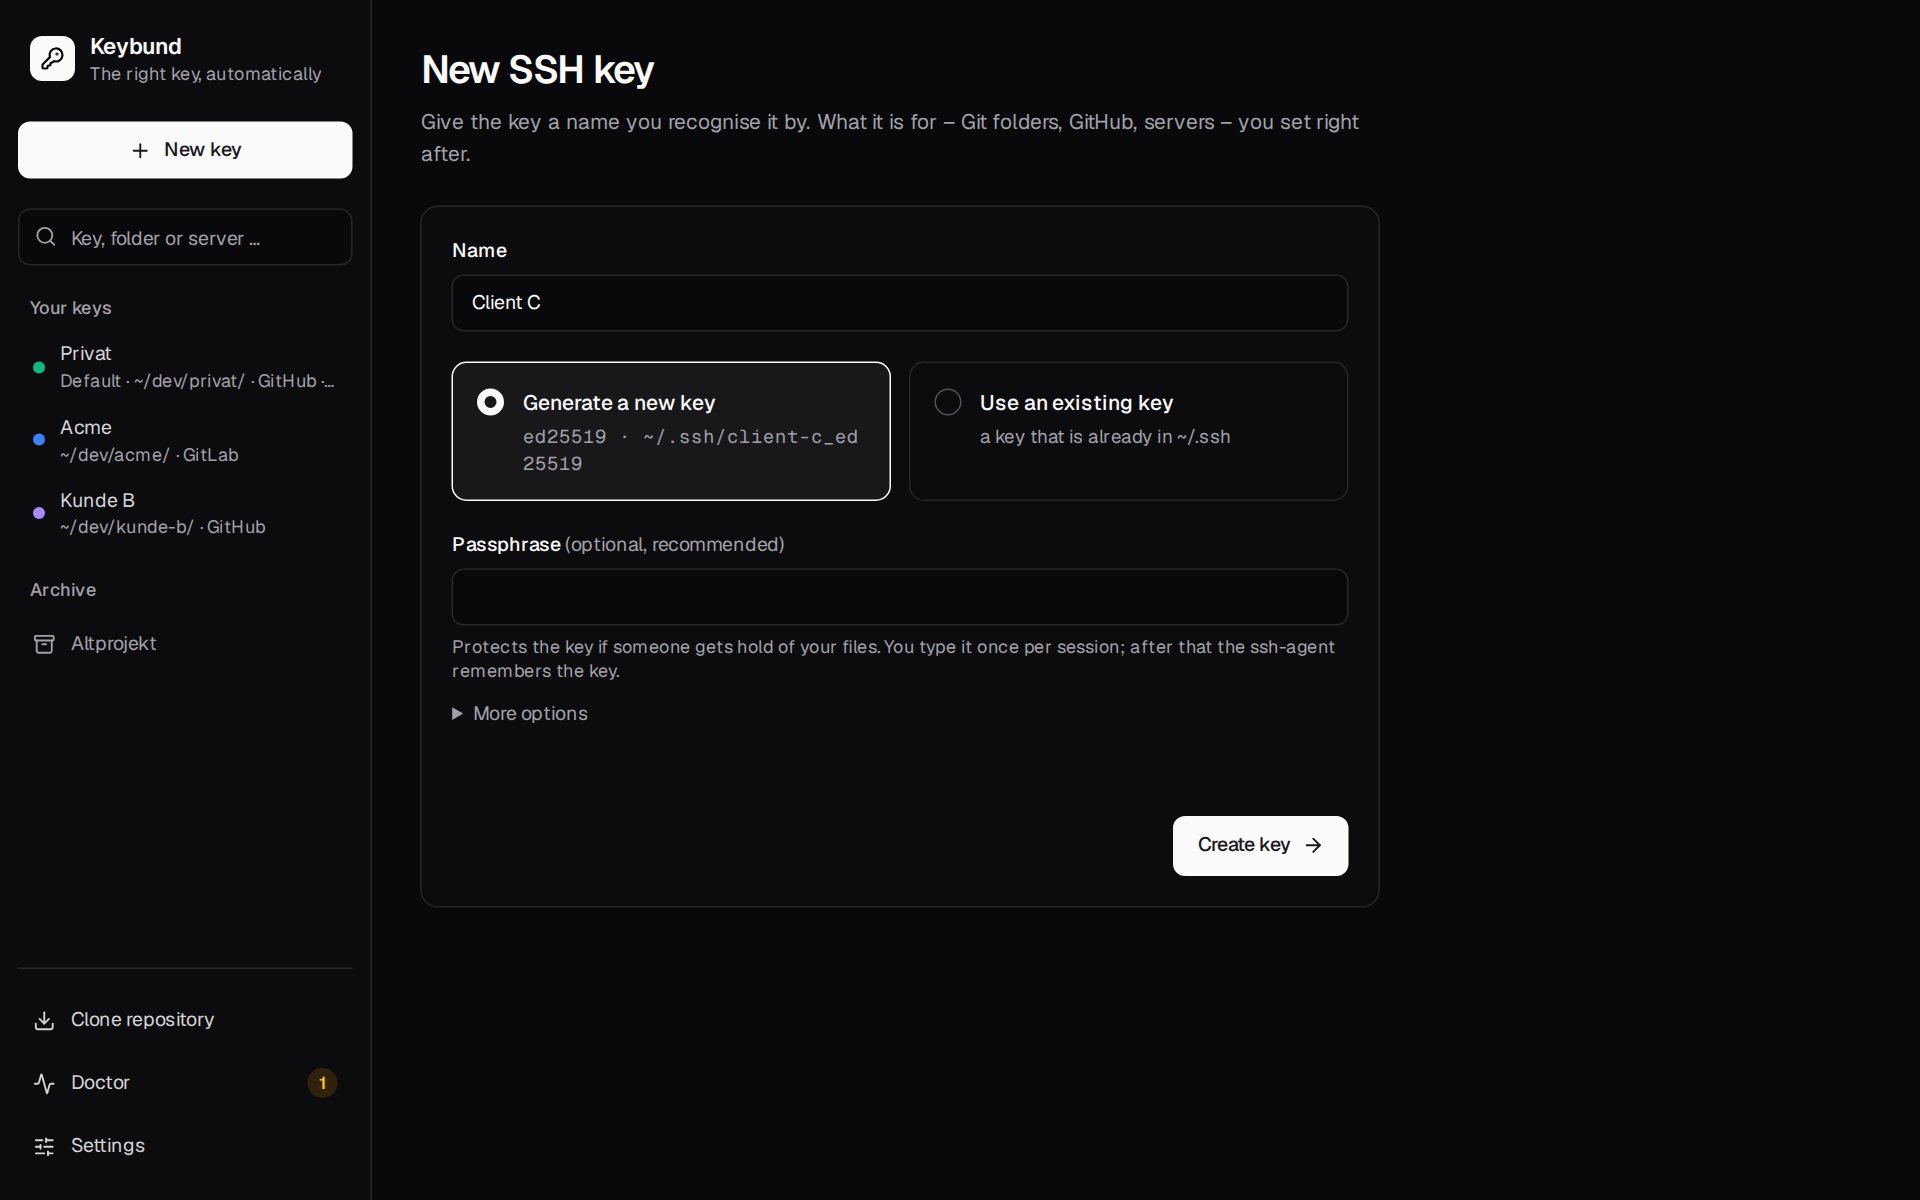
- Generate a new key runs
ssh-keygen -t ed25519and stores it as~/.ssh/<name>_ed25519(the folder can be changed in the settings). Ed25519 is the modern default that GitHub, GitLab, Bitbucket and every current OpenSSH server accept. - Use an existing key picks a key that is already in
~/.ssh. Nothing is moved or copied. - A passphrase is optional but recommended: it protects the key if someone gets hold of your
files. You type it once per session; after that
ssh-agentkeeps the key unlocked (Keybund writesAddKeysToAgent yeseverywhere).
Under More options you can change the key's comment – the text at the end of the public key by which you recognise it on GitHub or on a server.
On the command line:
2. Say where the key is used
A new key is not used anywhere yet. On its page, under Where is this key used?, add what it is for:
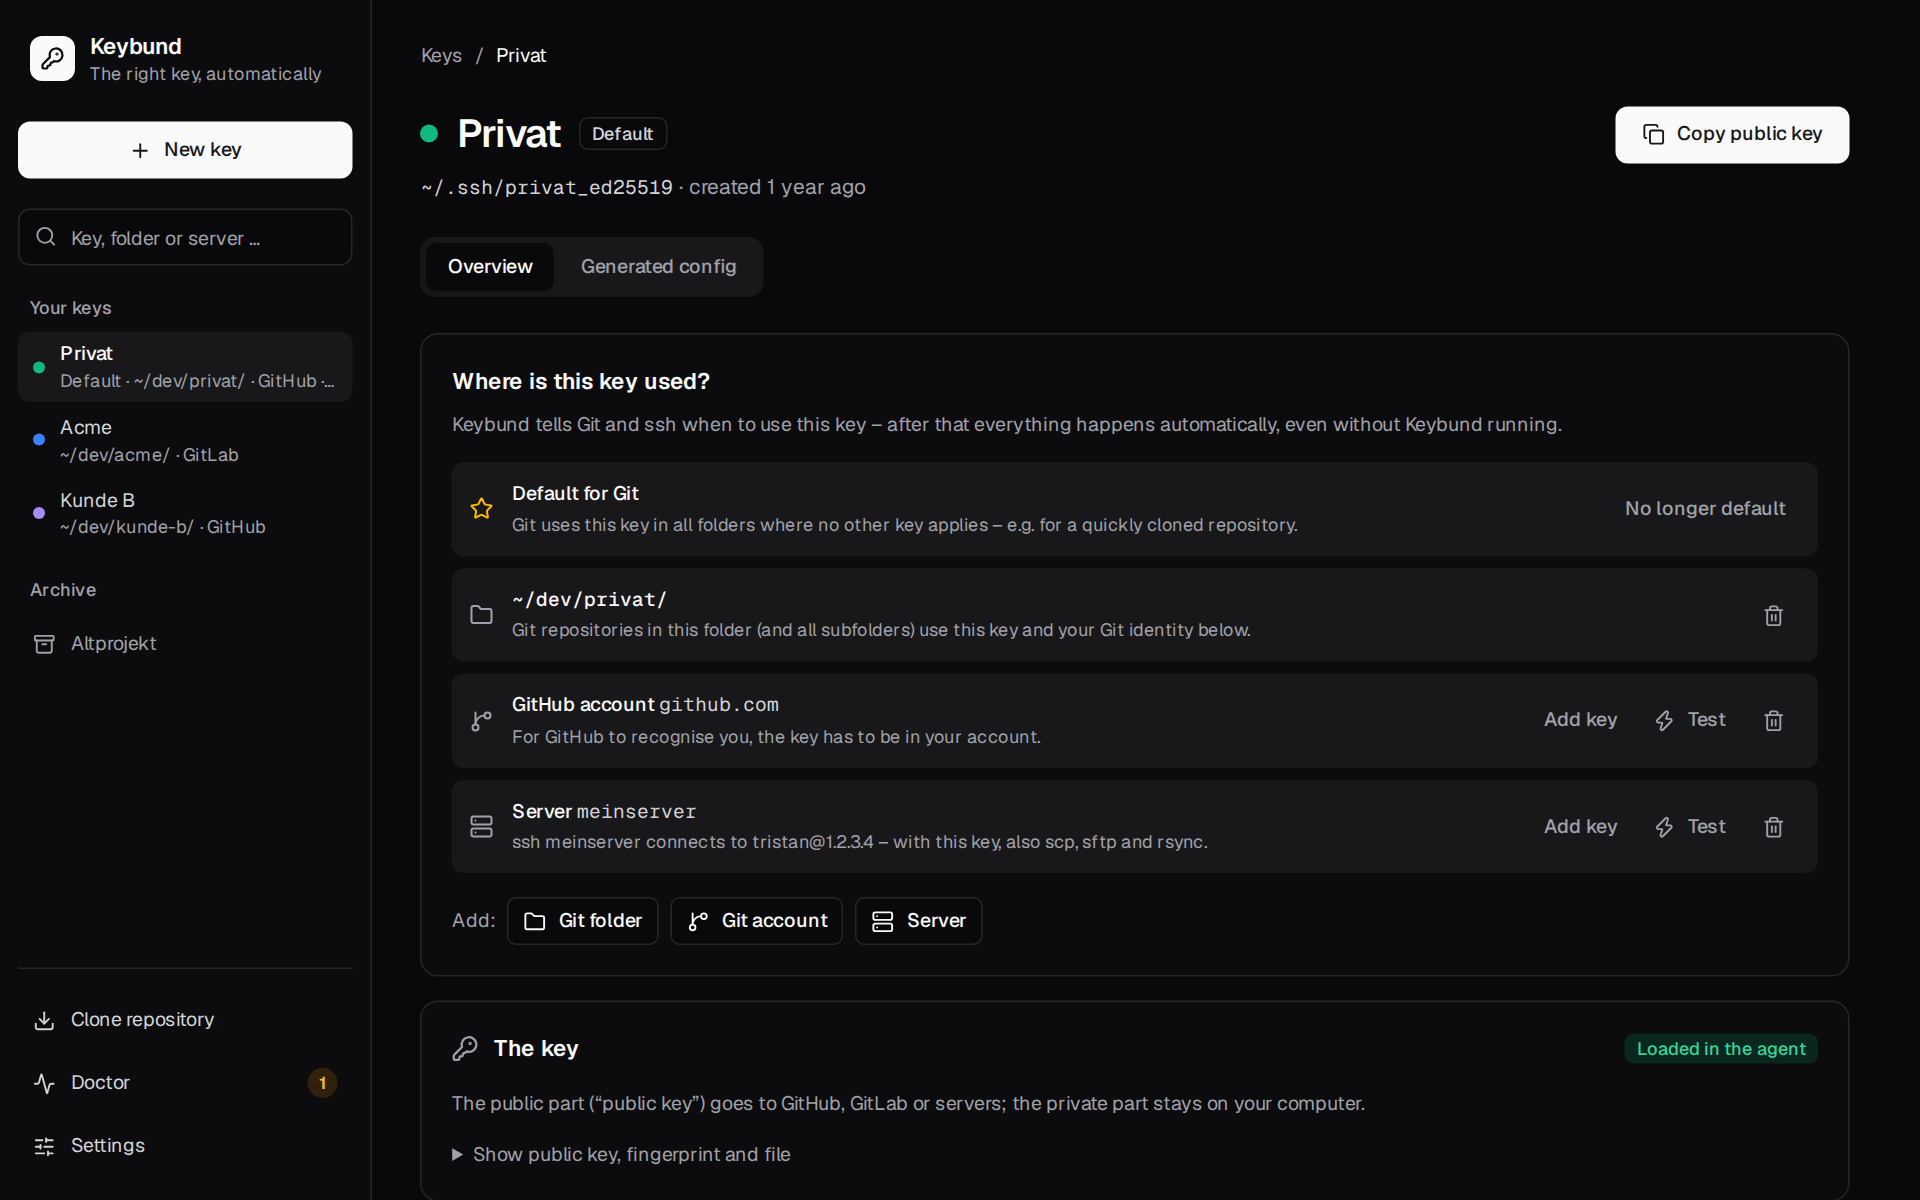
A Git folder
Add: Git folder, e.g. ~/dev/client-c/. Every repository in that folder
and below it now uses this key for git push, pull and fetch – whatever the remote URL is. With
the first folder you can also set the name and e-mail for commits in these repositories; leave
them empty to keep the identity from ~/.gitconfig.
Keybund then asks Where is the code?: GitHub, GitLab, Bitbucket – or later. That adds the matching Git account to the key.
A Git account
A Git account is GitHub, GitLab (also self-hosted, e.g. gitlab.company.com) or
Bitbucket. It says “the public key of this key has to be in that account”. Click Add key:
Keybund copies the public key to the clipboard and opens the page where you paste it
(e.g. https://github.com/settings/ssh/new). Paste it, save, then click Done – test now.
Make sure the browser is logged into the right account
The test shows the account GitHub or GitLab logged you in as (“Connected as @client-c-dev”), so you see immediately if the key ended up in the wrong account.
A server
Server: hostname or IP, an optional alias (nas), user and port. Afterwards ssh nas,
ssh 192.168.1.20, scp, sftp, rsync and Dolphin's sftp://nas all use this key.
Add key on a server works like ssh-copy-id: Keybund logs in the way that already works
for you (another key, or the server's password, asked once) and appends the public key to
~/.ssh/authorized_keys on the server.
Before the first connection to a server, Keybund shows its host key fingerprint and asks you to
confirm it (Fingerprint matches). Compare it with what the server's admin
or console shows (ssh-keygen -lf /etc/ssh/ssh_host_ed25519_key.pub on the server). The published
keys of GitHub, GitLab.com and Bitbucket are built in and need no confirmation. See
Security and host keys.
The default key (optional)
Default for Git makes Git use this key in every repository that is not in
one of your Git folders – a quickly cloned repository in ~/Downloads, for example. Without a
default key, ssh simply tries your keys as it always did. Set it on the key page or under
Settings.
3. Test
Every Git account and server has Test. The test runs ssh -T with only this key
(IdentitiesOnly=yes) and explains in plain words what happened – connection, host key, which key
was offered, which key the server accepted:
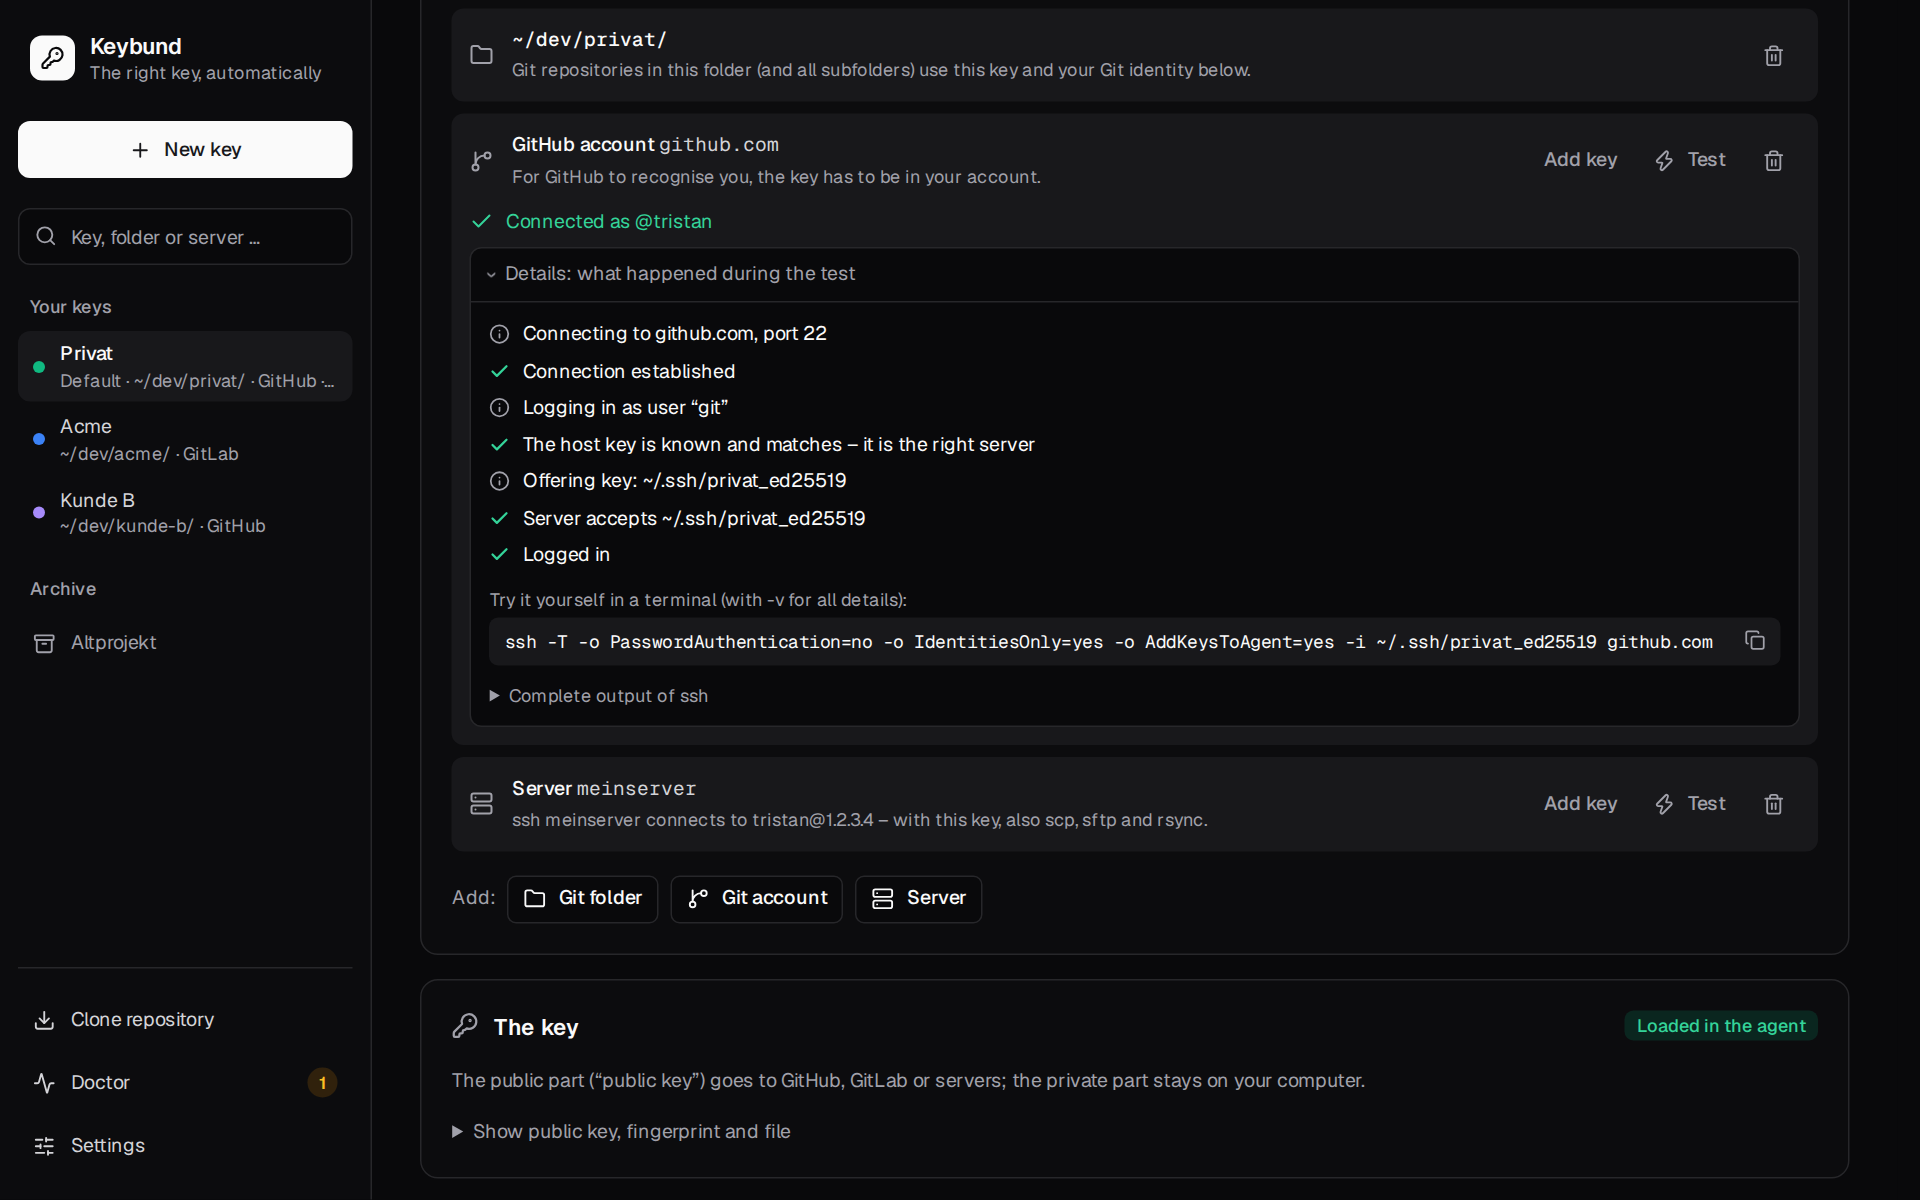
If a test fails because the server does not know the key yet, the matching button is right next to it (Copy public key & open GitHub page, Add key on nas). The last result of each key is kept and shown on the overview.
On the command line: keybund test client-c (exit code 0 on success).
4. Work as usual
That's it. Close Keybund. In ~/dev/client-c/ every git push uses the Client C key and commits
carry the Client C e-mail; ssh nas uses the NAS key. To check what applies where, type a folder or
host into the search field of the sidebar, or run keybund which in a repository:
$ cd ~/dev/client-c/app && keybund which
~/dev/client-c/app
  Key            ~/.ssh/client-c_ed25519
  Fingerprint    SHA256:2LX3eQAAjZ38jLPbuDwcWxLYGoRXCyA4EahseK644Yf
  Key            Client C
  Quelle         ~/.config/keybund/git/client-c.gitconfig · via includeIf "gitdir:~/dev/client-c/"
  Git-Identität  Tristan <tristan@client-c.com>
  IdentitiesOnly ja, nur dieser Key wird angeboten
  Agent          geladen
To clone a new repository into the right folder with the right key – even before includeIf can
apply – use Clone repository or keybund clone git@github.com:client-c/app.git.
Taking over an existing setup
If your ~/.ssh/config already has blocks like
the overview offers Take over. In the app it is one click (Take over 2 keys):
- Every
Hostblock with its ownIdentityFilebecomes a key in Keybund. The key files stay where they are. Aliases stay aliases; a plainHost github.combecomes the default key for github.com (if there is none yet). - Keybund writes its configuration.
- The taken-over blocks are removed from
~/.ssh/config, after a backup to~/.ssh/config.keybund-backup. You can untick this, but it is recommended: as long as anIdentityFilefor github.com is still there, ssh offers that key in addition to Keybund's, and a login can succeed with the wrong key. Blocks with more than Keybund handles (ProxyJump,LocalForward, severalIdentityFilelines …) are always kept.
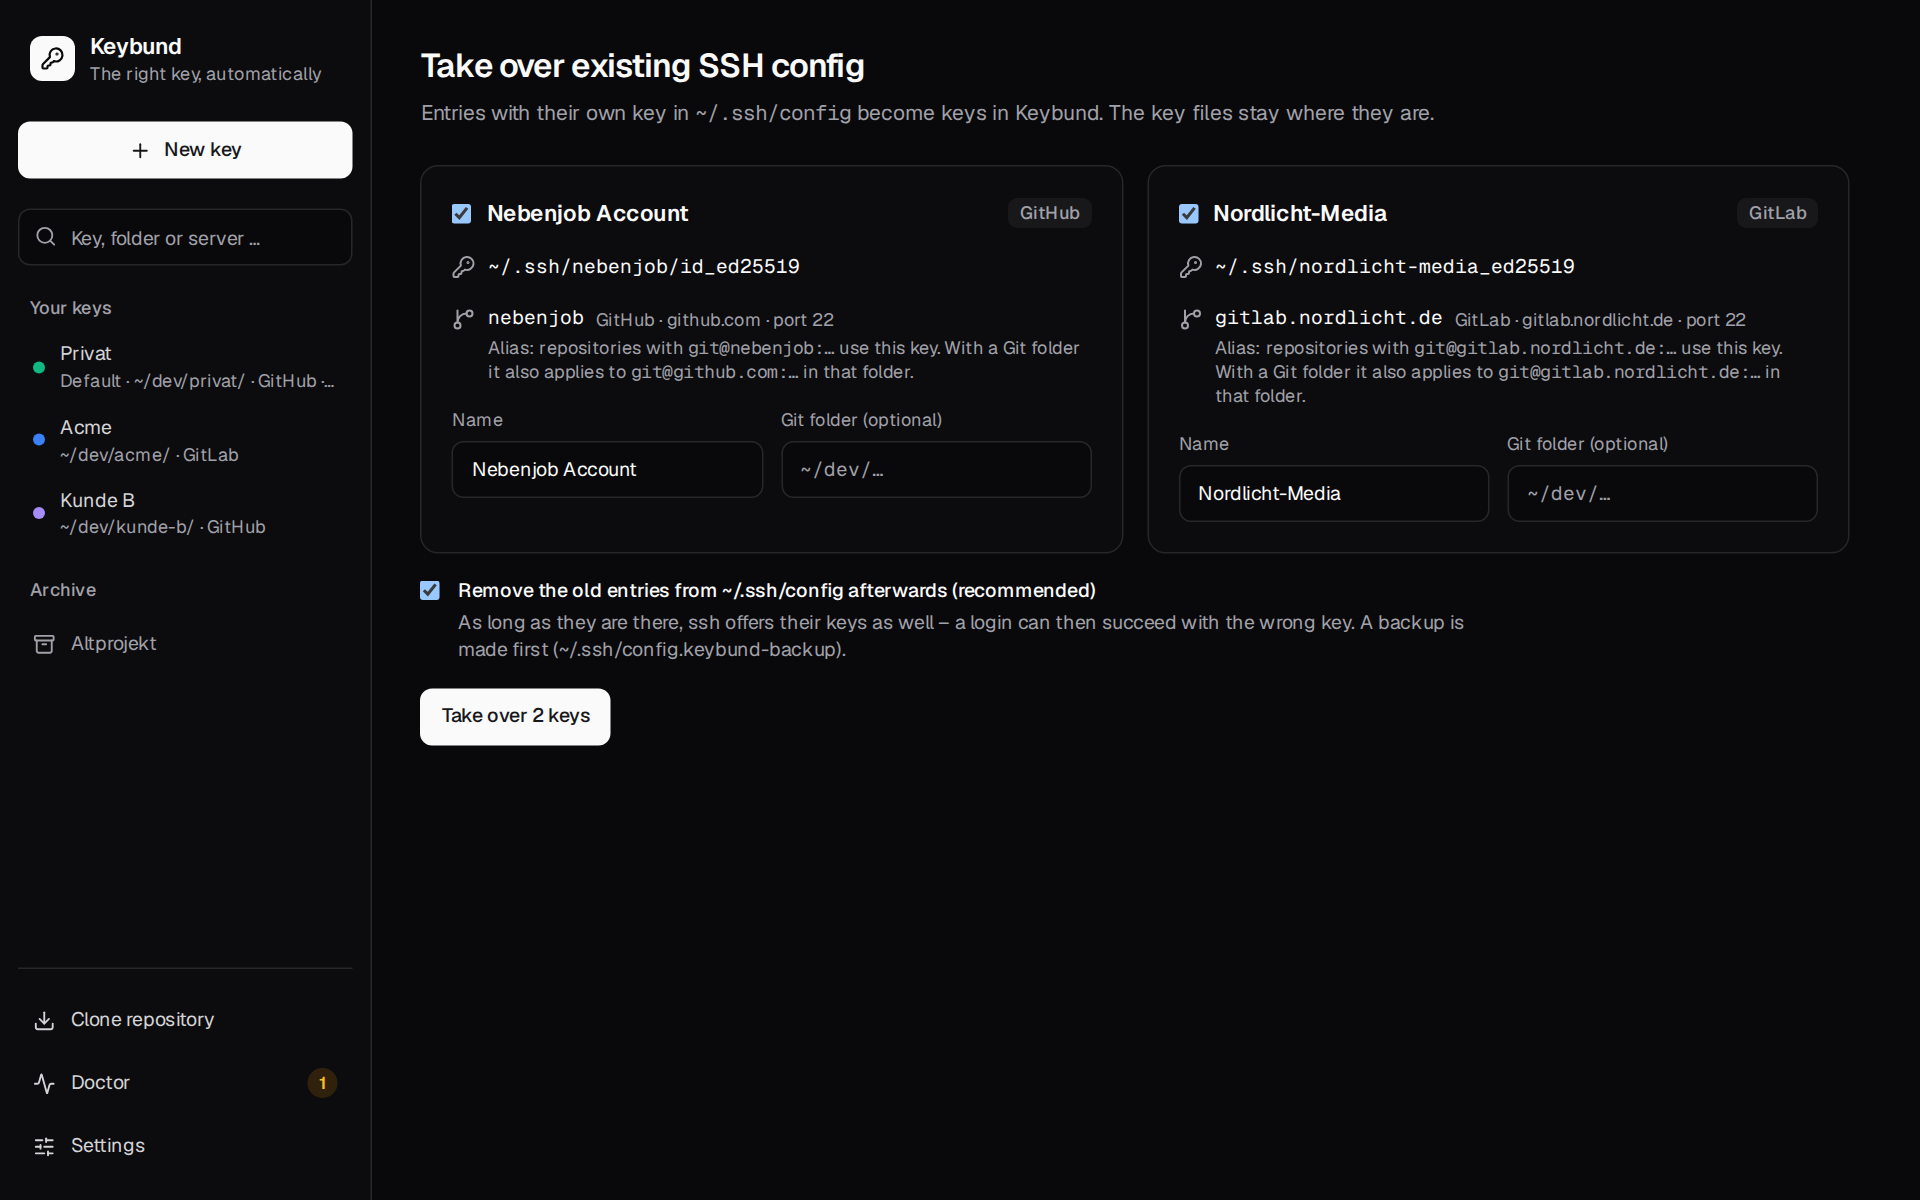
On the command line: keybund import (asks for each block) or keybund import --all --yes.
Afterwards give the imported keys a Git folder where it makes sense, so commits in those folders get the right identity too.