Setup
Three steps: let Kodi accept remote control, tell the extension where Kodi is, and allow the browser to talk to that address. It takes two minutes and is done once per Kodi device.
1. Allow remote control in Kodi
- In Kodi, open Settings → Services → Control.
- Turn on Allow remote control via HTTP.
- Note the port (default
8080) and set a username and a password. Current Kodi versions require a password before the web server accepts remote control. - Leave Allow remote control from applications on other systems on if the extension runs on a different computer than Kodi (the normal case). Allow remote control from applications on this system is enough only when the browser runs on the Kodi device itself.
The IP address of the Kodi device is under Settings → System information → Network. Give the device a fixed IP in your router, or use its hostname, so the address doesn't change after a restart.
Kore users
If the Kore Android app already controls your Kodi, these settings are already on; use the same address, username and password in the extension.
2. Enter the connection
- Click the SendToKodi icon in the toolbar and then the ⚙️ gear icon in the popup. The first time, the popup opens the settings on its own because no connection exists yet.
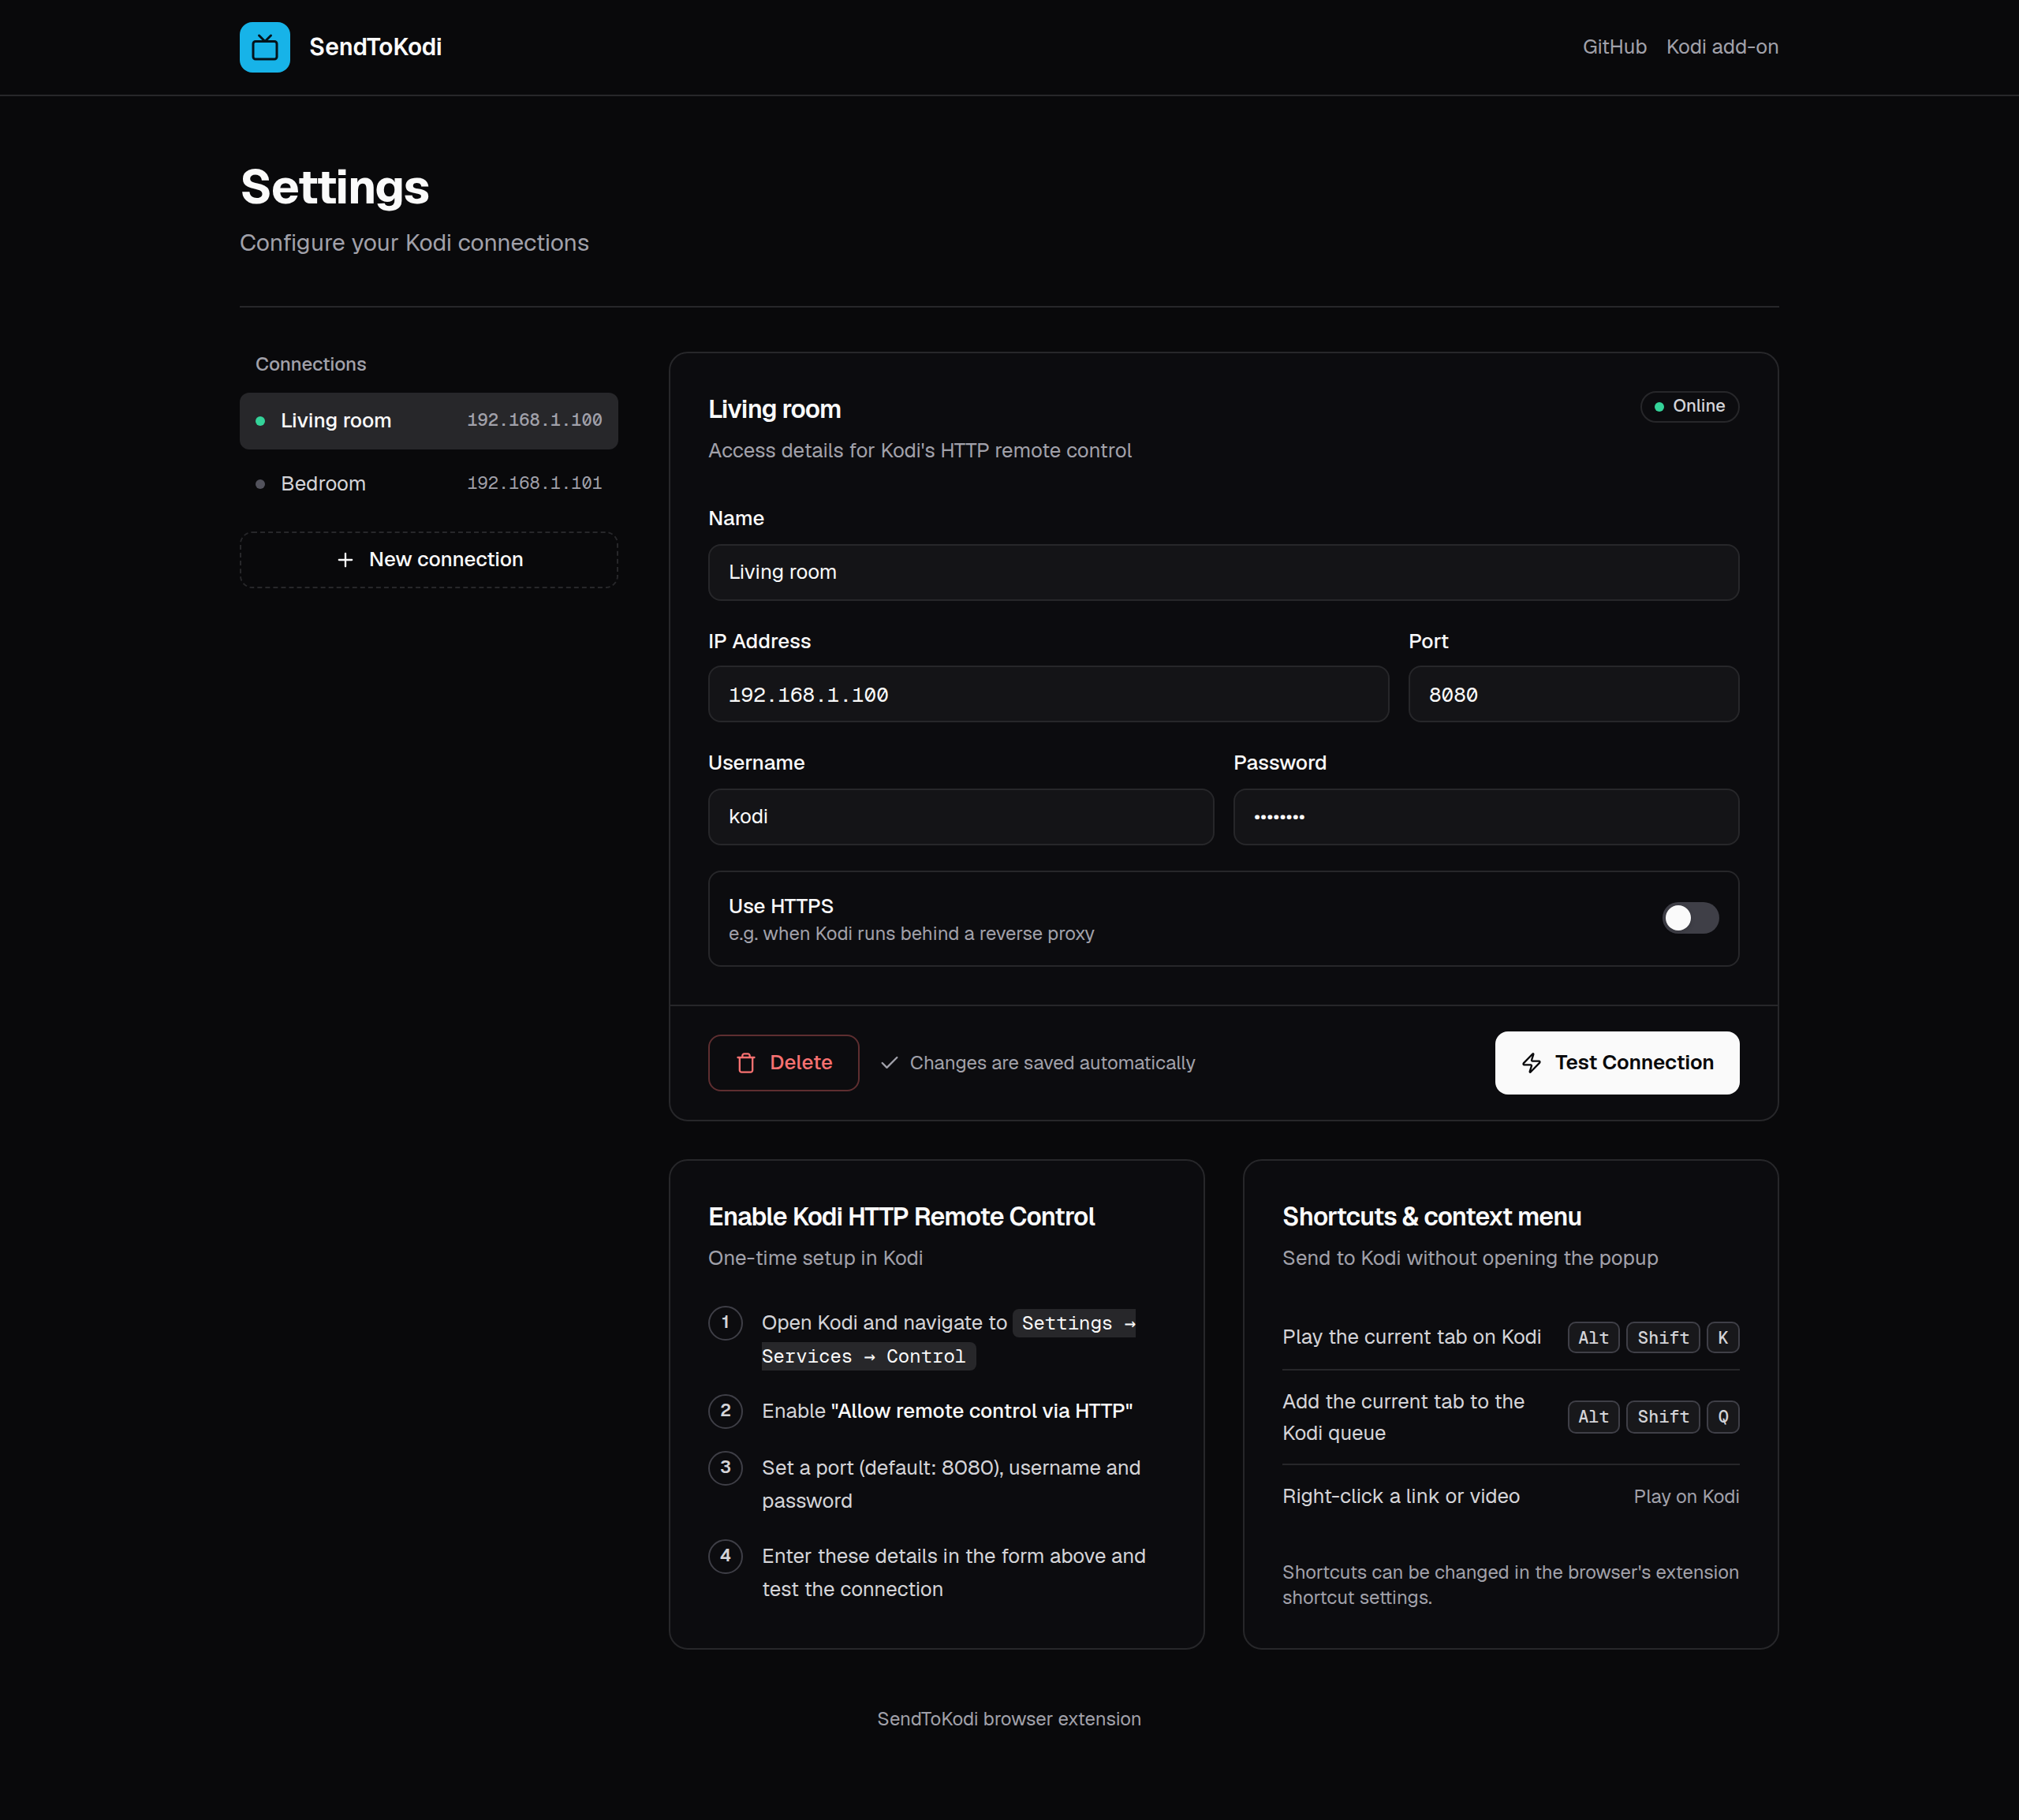
- Enter the IP address or hostname, the port, the username and the password from step 1. Leave Use HTTPS off; Kodi itself only speaks HTTP (see HTTPS).
- Give the connection a name such as Living room. Everything is saved as you type.
For more room, open the full settings page with the ↗ icon in the popup, or through Extension options in your browser's extension manager. The settings page also shows the Kodi steps and the current keyboard shortcuts.
3. Test the connection and grant access
Click Test Connection. The browser now asks whether SendToKodi may access your Kodi's address (for example
http://192.168.1.100): click Allow. The extension asks only for this one address, never for the websites you
visit; see Privacy & permissions.
Connection successful and the status badge Online mean you are done. Open a video page and press Play.
The permission prompt only appears from the popup or the settings page, because the browser does not allow it from a context menu or a keyboard shortcut. So test the connection once before using those.
Several Kodi devices
Add a connection per device with New connection on the settings page (or New in the popup's settings). Each one has its own name, address and credentials and its own permission prompt the first time. The dropdown in the popup switches the active device; the context menu and the shortcuts always use the active one. The selected connection shows whether it is reachable as a coloured dot and the Online / Offline badge.
Connections are stored in your browser's extension storage and, if you have browser sync turned on, synced to your other computers with the same browser account.
HTTPS behind a reverse proxy
Kodi's web server speaks plain HTTP. Turn on Use HTTPS only when a reverse proxy such as nginx, Caddy or Traefik
with a valid certificate sits in front of Kodi and forwards to its HTTP port. Enter the proxy's hostname and port (443
for the default HTTPS port) and the Kodi username and password; the proxy must pass the Authorization header
through. With a self-signed certificate the browser refuses the connection until the certificate is trusted.
Kodi on another network
The browser has to reach Kodi's address directly. Options when they are not on the same network:
- A VPN into the home network (WireGuard, Tailscale, the router's own VPN). Then Kodi's local address works as at home.
- A reverse proxy with HTTPS and authentication exposed to the internet, as above. Never expose Kodi's HTTP port itself to the internet; its basic authentication is not meant for that.
Changing or removing a connection
Select the connection on the settings page, edit the fields (saved automatically) or press Delete twice. Deleting the last connection empties the extension; it then opens the settings again at the next click.